Oxen.ai allows you to fine-tune a Vision Language Model (VLM) to understand images and videos. Fine-tuned VLMs are great way to process data at scale with high throughput, low latency, and high accuracy in your domain. When you canโ€™t describe your task in a text prompt, you can fine-tune a VLM to understand it.

Preparing the dataset

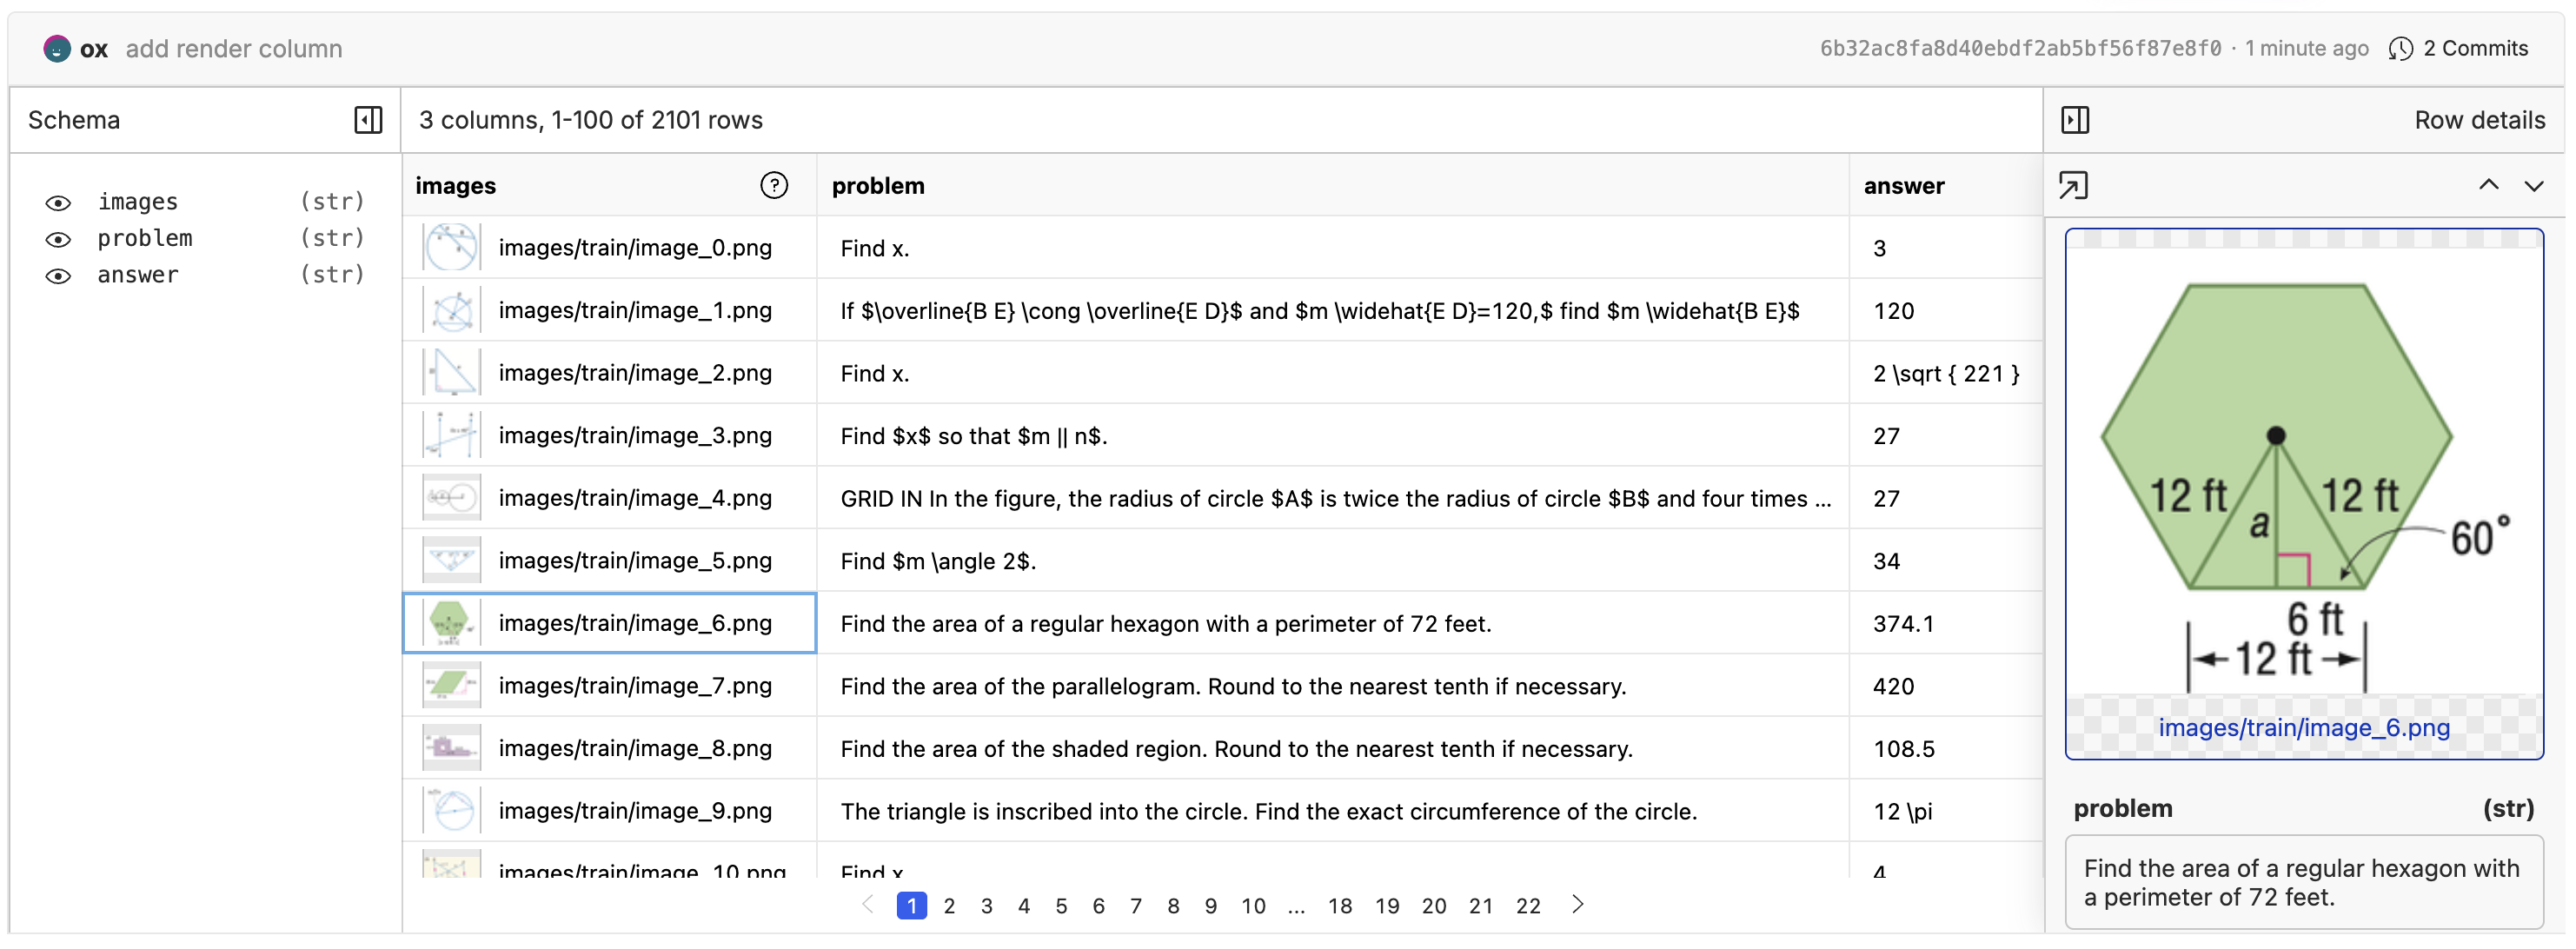
When fine-tuning a VLM, you need a dataset that contains the images, user prompts, and responses that are expected from the VLM. The dataset format can be a csv, jsonl, or parquet file with a column that contains the relative path to the image in the repository. To see an example of the dataset format, check out the Tutorials/Geometry3K dataset. Each row in this dataset should have an associated image in the repository stored at images/train/image_{n}.png. Dataset Format To upload the dataset you can use the oxen command line interface. Hereโ€™s an example of creating a repository from the command line and uploading data:
# Navigate to the directory containing your dataset
cd path/to/data

# Set your username and repository name
export USERNAME=YOUR_USERNAME
export REPO_NAME=YOUR_REPO_NAME

# Create a new repository on the remote server
oxen create-remote --name $USERNAME/$REPO_NAME

# Set the remote origin to the new repository
oxen config --set-remote origin https://hub.oxen.ai/$USERNAME/$REPO_NAME

# Add the dataset to the repository
oxen add .

# Push the dataset to the remote server
oxen push

Rendering Images

In order to view the images, you will need to enable image rendering on your images column. Click the โ€œโœ๏ธโ€ edit button above the dataset, then edit the column to enable image rendering. The video below shows the whole process.

Fine-tuning a model

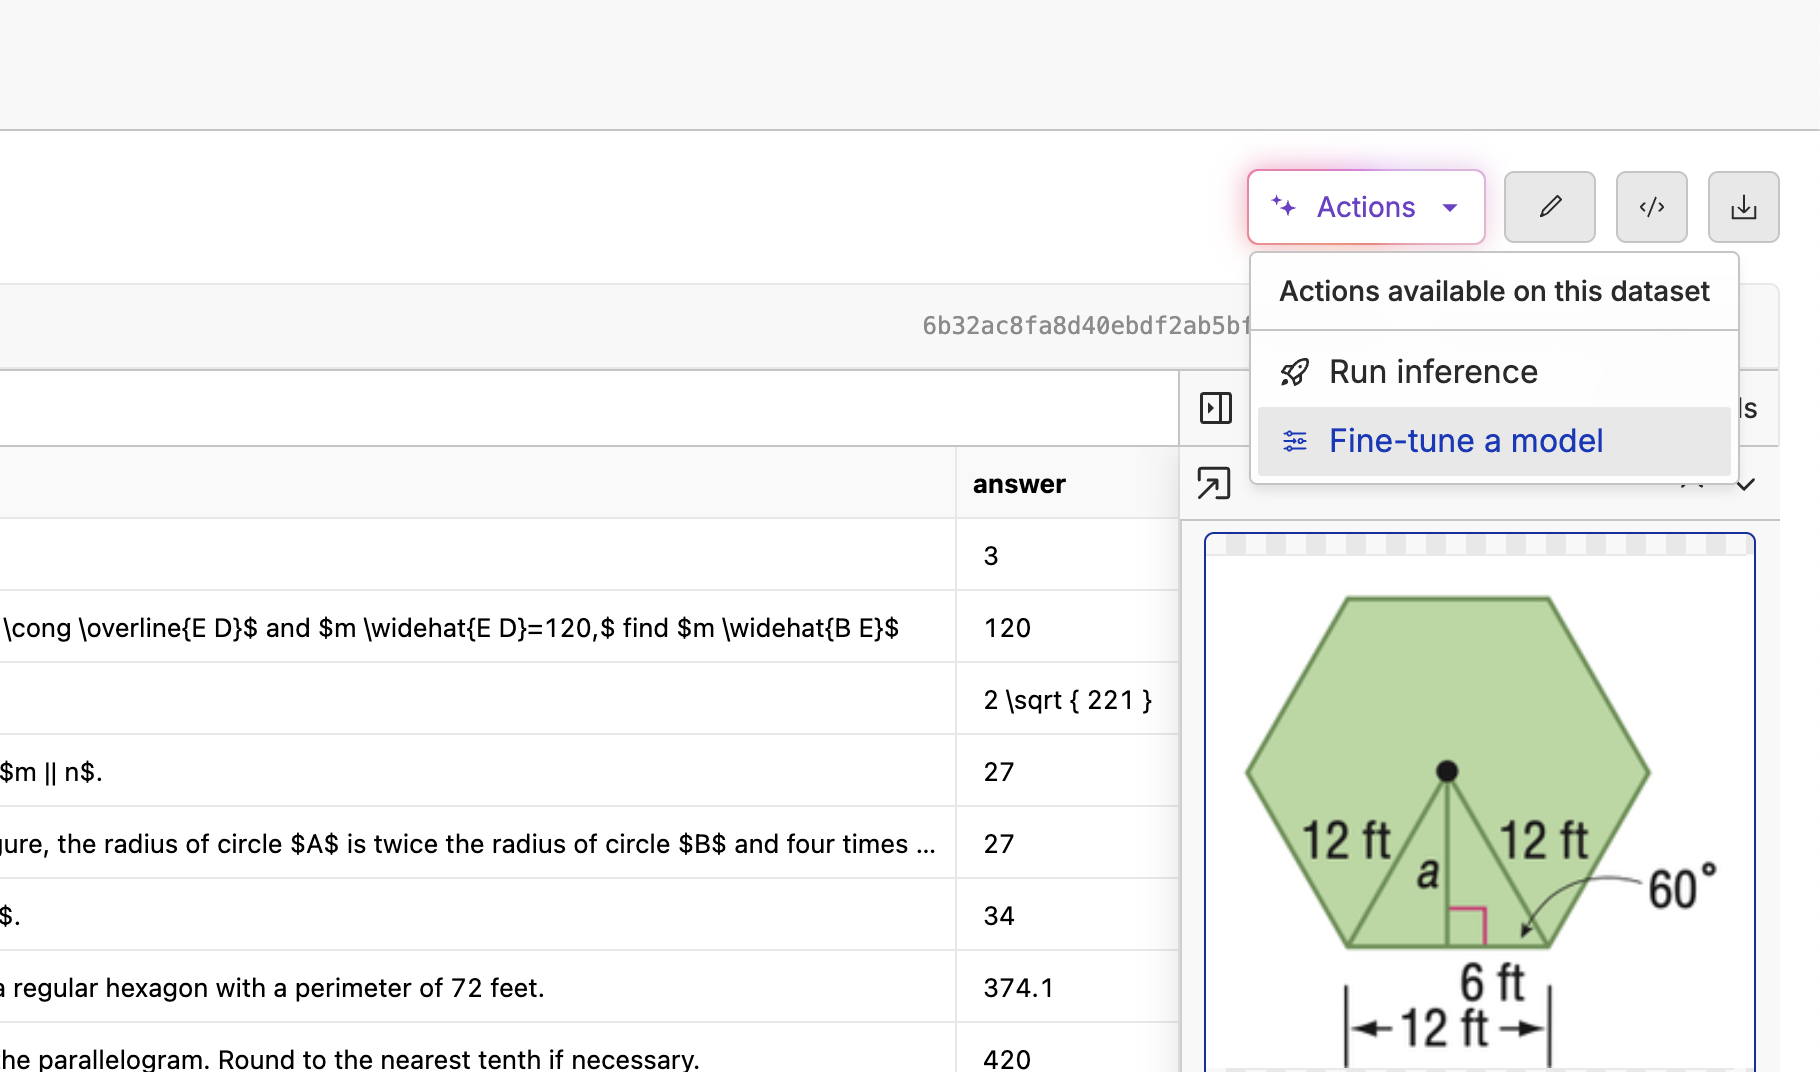
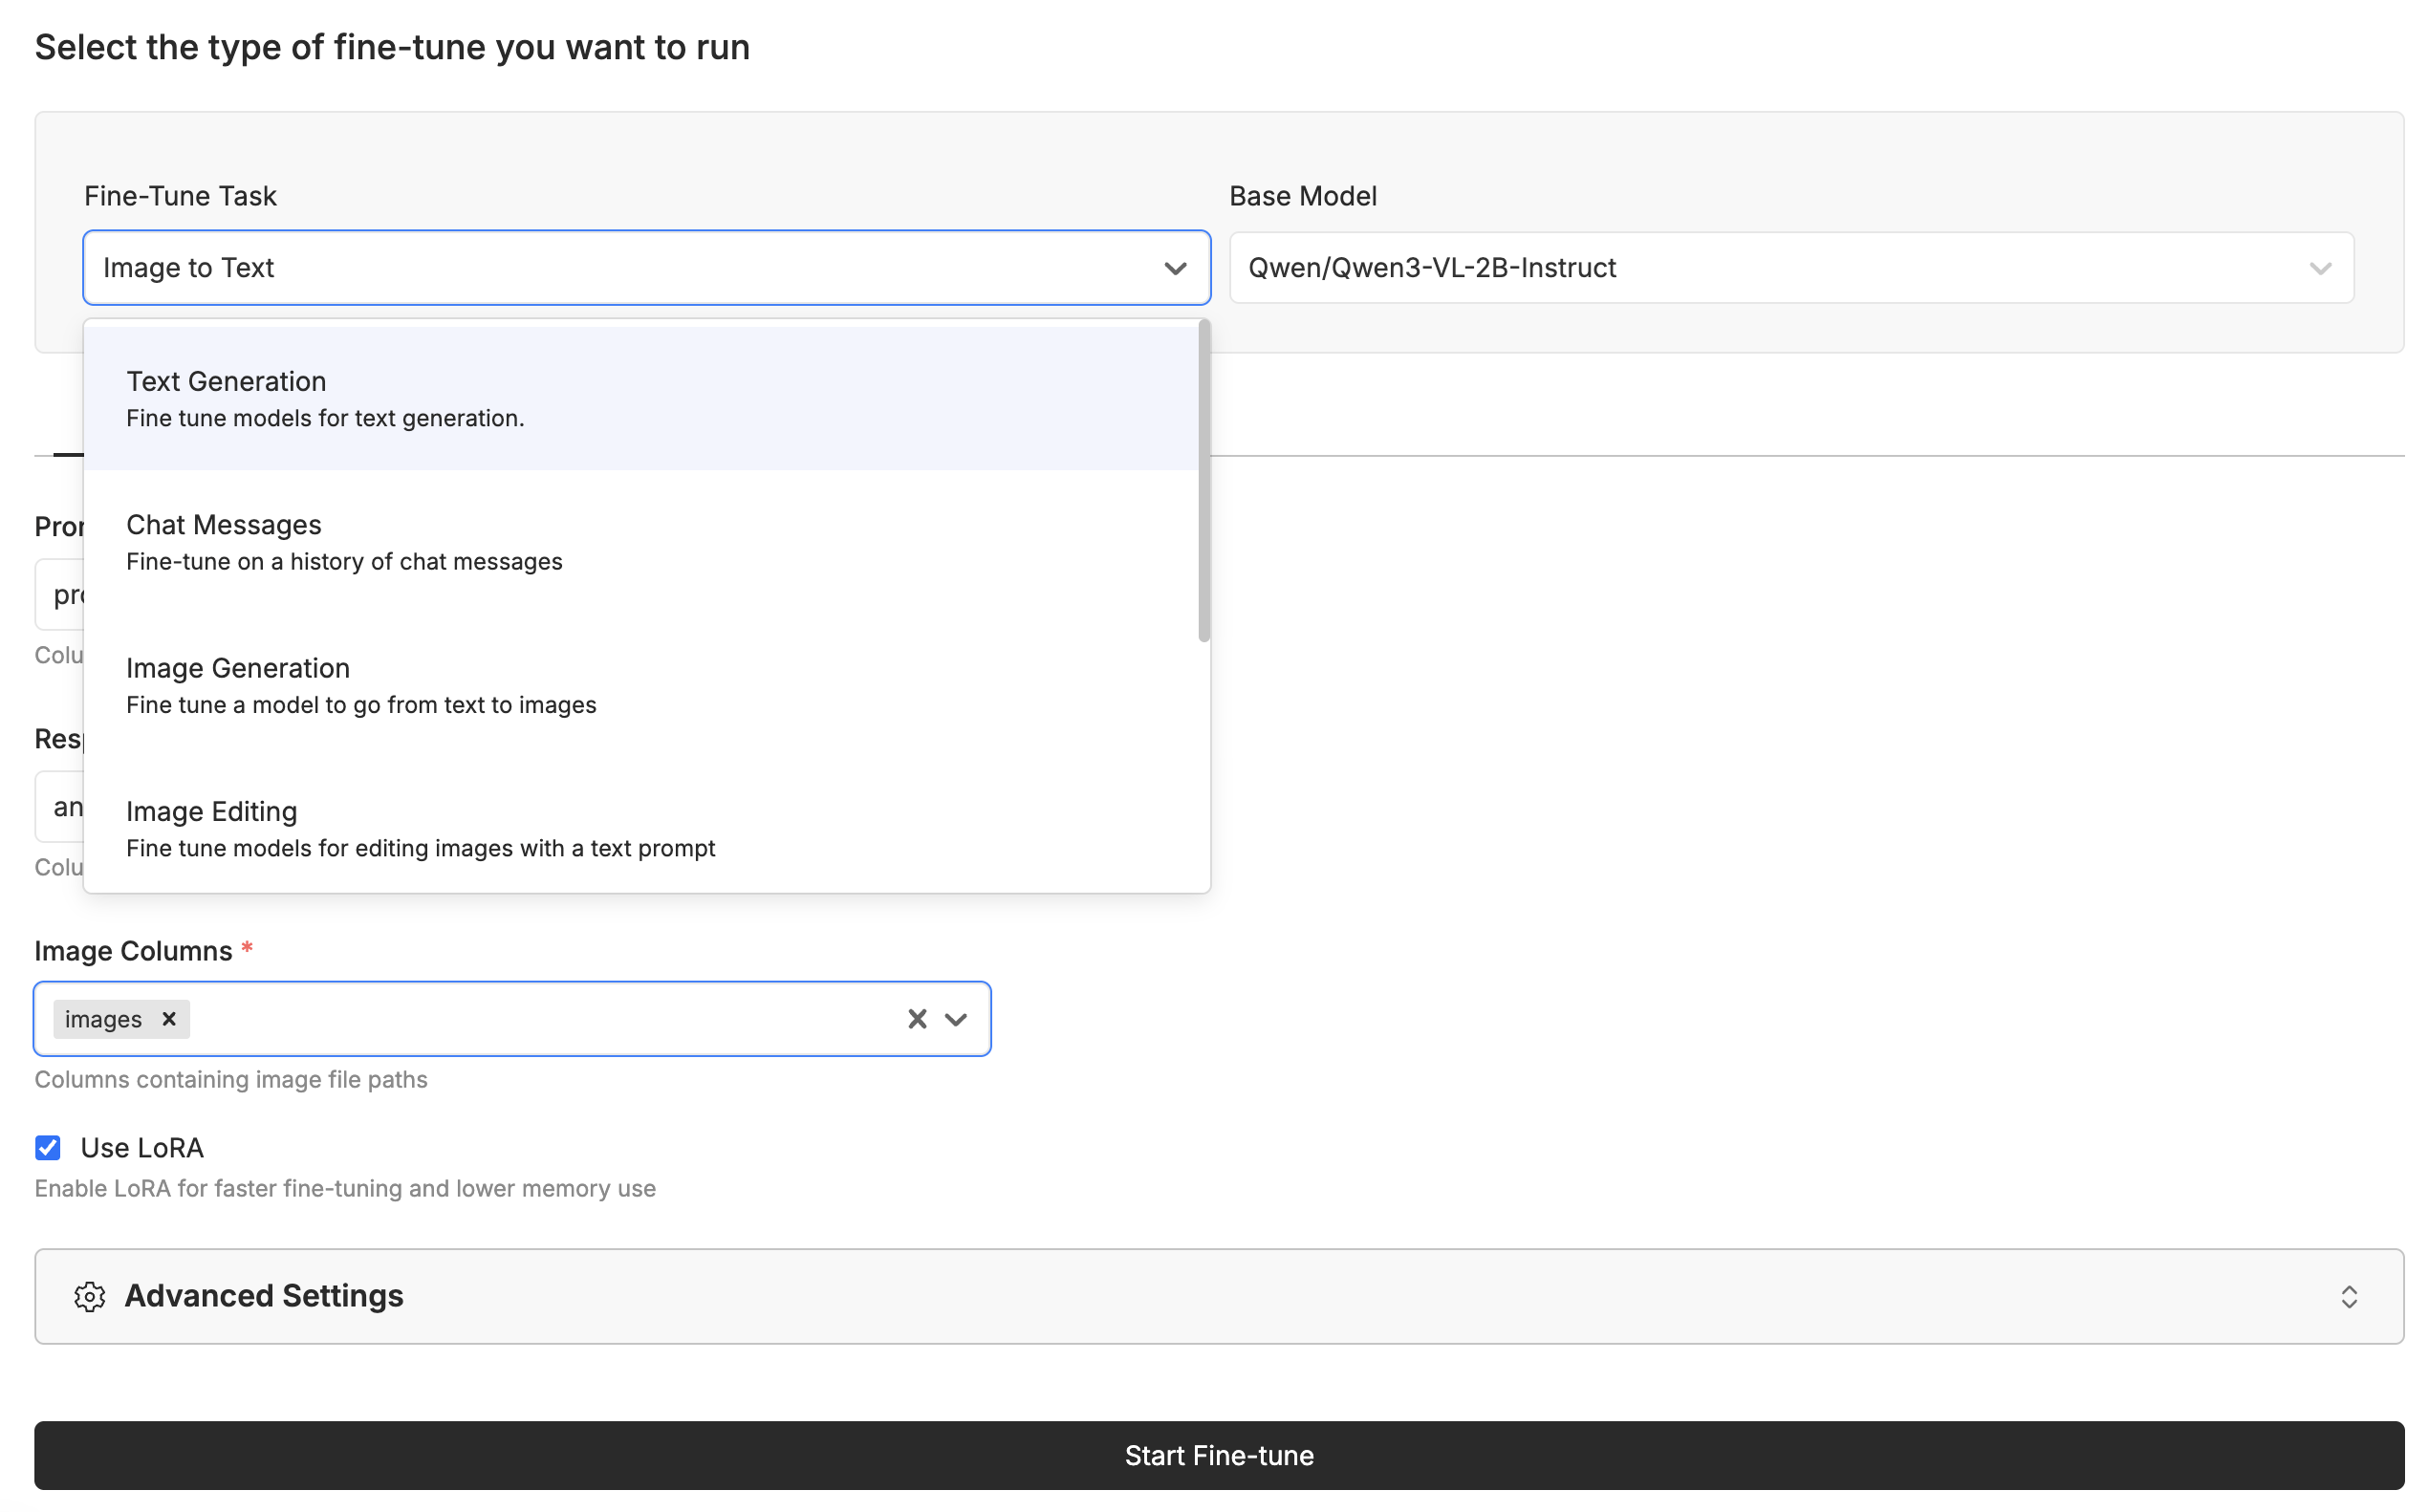
With your images labeled and you are happy with the quality and quantity, it is time to kick off your first fine-tune. Click the โ€œActionsโ€ button and select โ€œFine-Tune a Modelโ€. Kick off Fine-Tune This will take you to the fine-tune page where you can select the model you want to fine-tune. Select the Image to Text task, and select the Qwen/Qwen3-VL-2B-Instruct model. Make sure the โ€œImageโ€ column is set to the proper image column, and the โ€œPromptโ€ and โ€œResponseโ€ columns are set to the inputs and outputs you expect. Select Task All you have to do now is click โ€œStart Fine-Tuneโ€, sit back, grab a coffee, and watch the model learn.
Deploying the Model

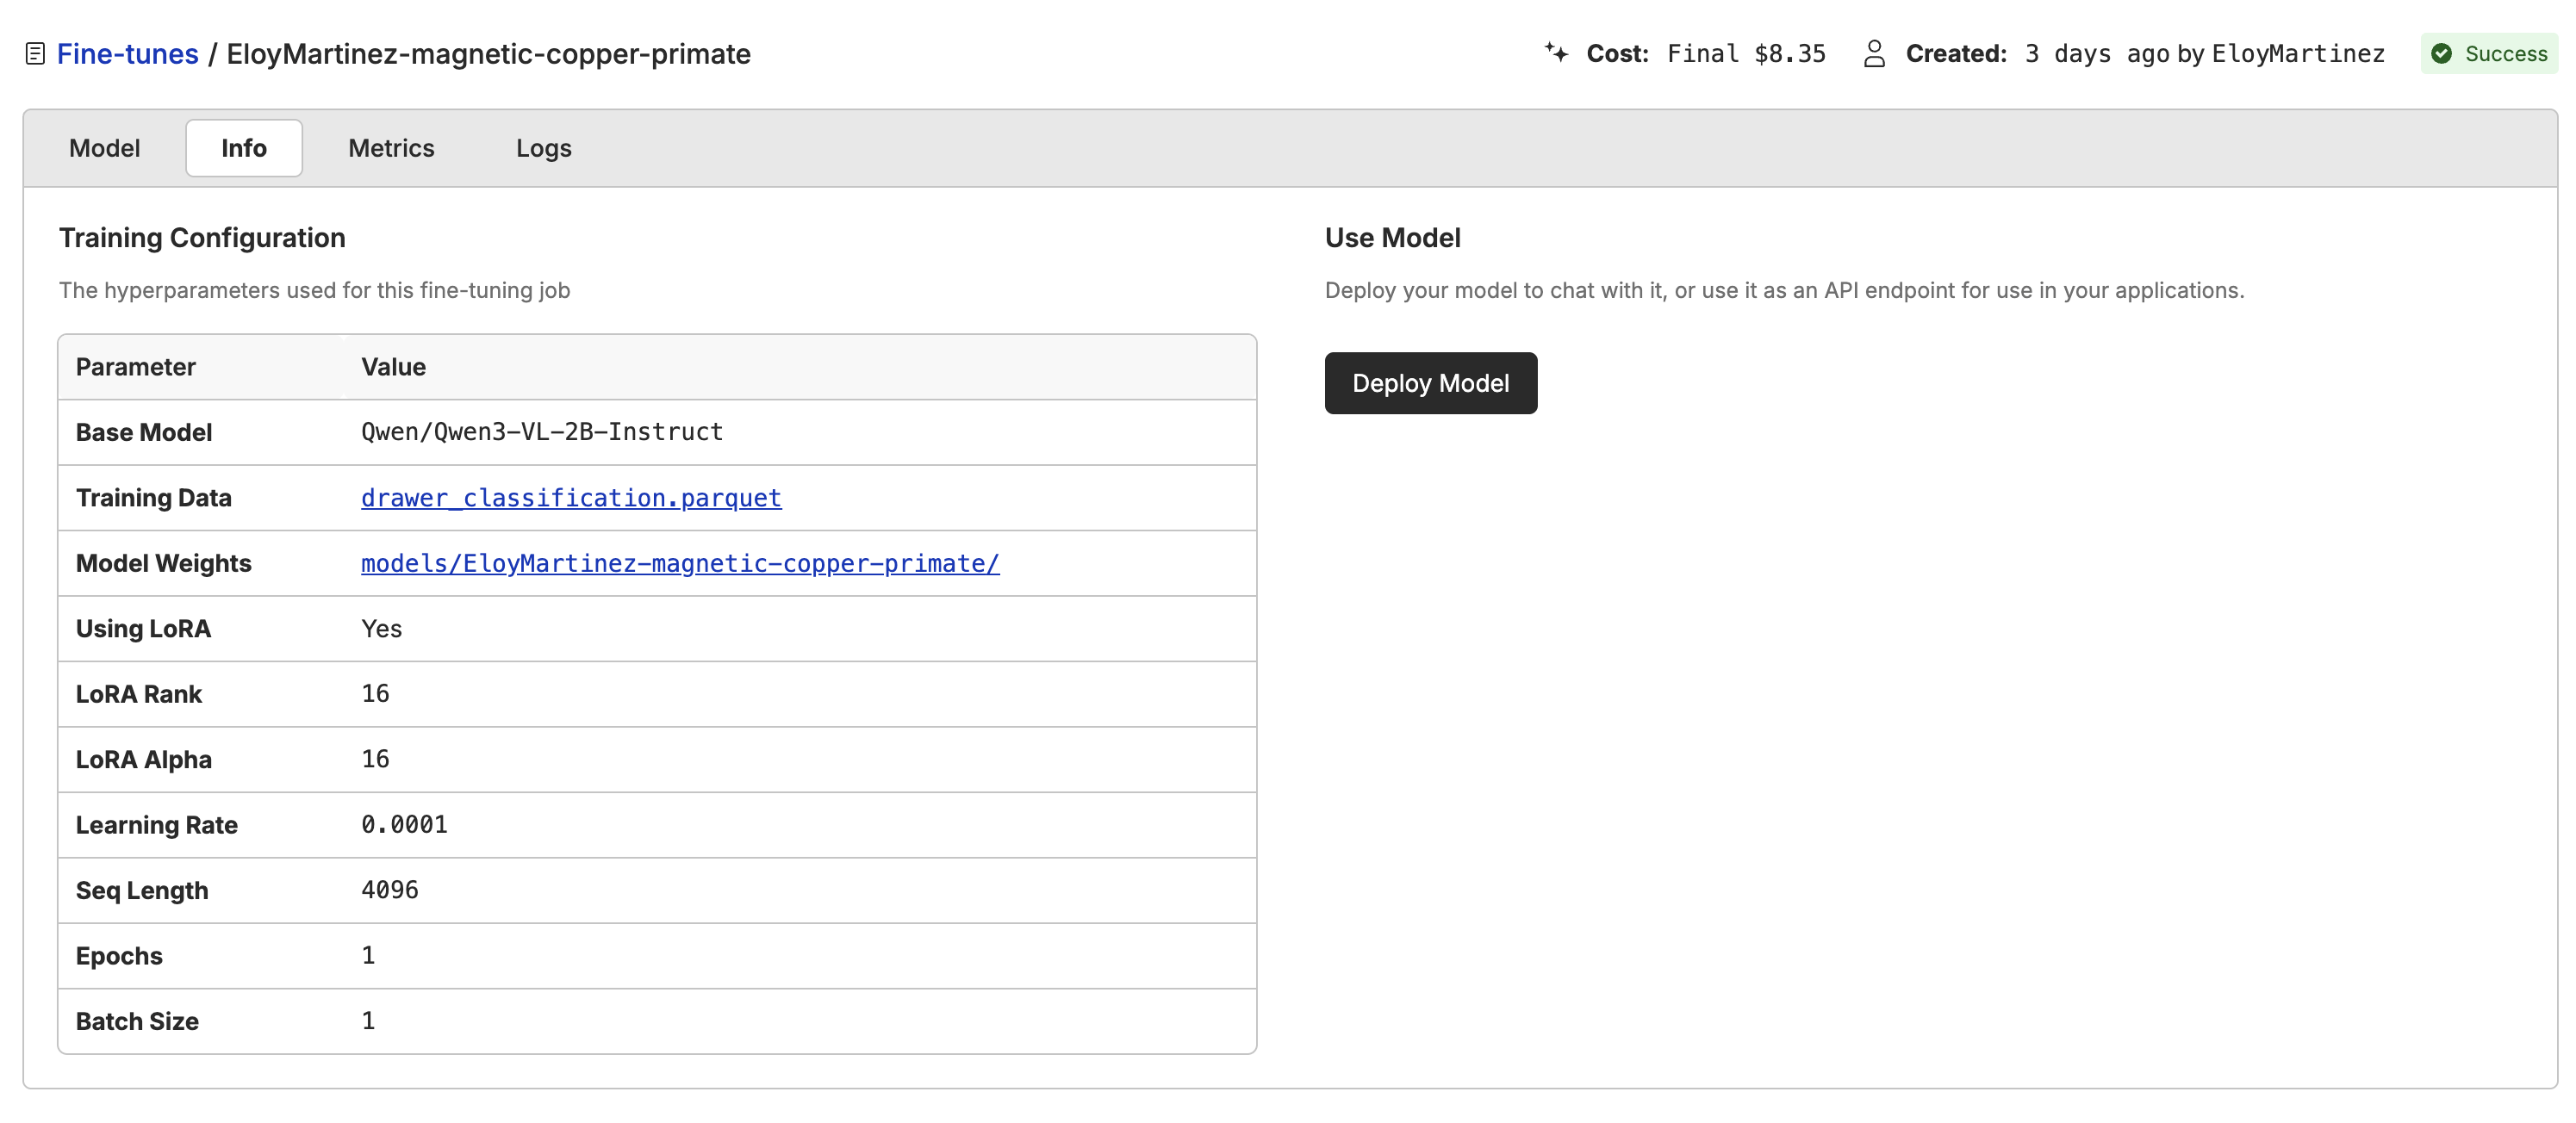
Once the model is trained, you can deploy it to the cloud and start using it in your applications. Click the โ€œDeployโ€ button and we will spin up a dedicated GPU instance for you. Deploy Model Once the model is deployed, you can chat with it in the UI or via the API. Replace the model name with the name of your deployed model.
curl -X POST \
-H "Authorization: Bearer $API_KEY" \
-H "Content-Type: application/json" \
-d '{
  "model": "oxen:ox-comfortable-sapphire-locust",
  "messages": [
    {
      "role": "user",
      "content": [
        {
          "type": "text",
          "text": "What is in this image?"
        },
        {
          "type": "image_url",
          "image_url": {
            "url": "https://oxen.ai/assets/images/homepage/hero-ox.png"
          }
        }
      ]
    }
  ]
}' https://hub.oxen.ai/api/chat/completions
For more ways to call the API, check out the inference examples.

Downloading the Weights

One of the benefits of using Oxen.ai is we give you the flexibility of deploying to our cloud or managing your own infrastructure. If you want to download the model weights, you can click the path to the model weights and download them.
oxen download user-name/repo-name path/to/model.safetensors --revision COMMIT_OR_BRANCH

Need Help Fine-Tuning?

If you need help fine-tuning your model, contact us at hello@oxen.ai and we are happy to help you get started.